Showing posts with label N76012. Show all posts

Monday, May 15, 2017

flying with Nick, finally!

Another first!   Nicholas and I spent a great day doing guy stuff.  Started out at the local firing range and went through about 300 rounds of 9 mm and 223.  Lada said it was OK to take Nicholas flying, so we headed over to Urbana for a nice Sunday afternoon lunch.  For those of you who are familiar with the restaurant at Urbana, you know what I’m going to say next:  they’re closed on Sunday afternoon.

Oh, well.  Back in the plane and on our way home to try something else!  Here’s Nick climbing out of Urbana.  He’s doing very well for his first flight on the controls!


IMG 5712

Nick, piloting on a beautiful day!


One of the ‘Hey, wow!” moments came when he realized he could recognize things on the ground.  For example, this is his old middle school when he lived in Marysville.  I think that the excitement in his voice when he made the identification was wonderful.  I hope that he will spend more time in the air with me.

IMG 5710

Sunday, April 23, 2017

First Fly-in


IMG 5642

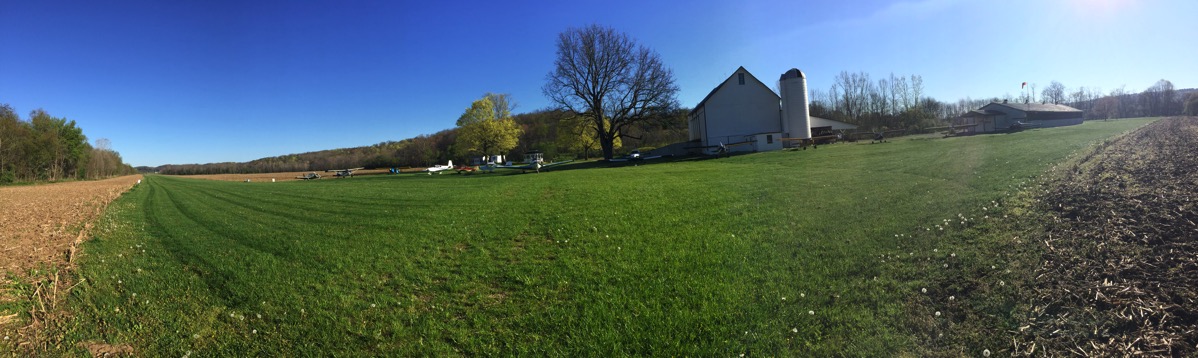
180° view from the end of Butler’s grass strip

There’s a group of mostly RV flyers here at Delaware Airport, who fly out to breakfast most Sundays.  On 4/23, I finally was able to get my butt out of bed early enough to join them.  Well, actually, I didn’t go to bed that night and was able to join them.  I flew to work on Saturday 22, and flew directly from work (Fayette Co) I23 to breakfast at Butler, a grass strip that doesn’t even have an FAA designation.

I wish I had some inflight pictures, as the day was simply wonderful for flying.  A great, crisp spring morning with outstanding visibility and not a cloud in the sky.  I found the grass strip, made a nice pattern and just grazed the grass and rolled all the way to the end.  I was a few minutes late getting to the restaurant in town, but had a great breakfast and enjoyed meeting the gang.  We all walked back, and had an equally nice flight back home.


IMG 5650

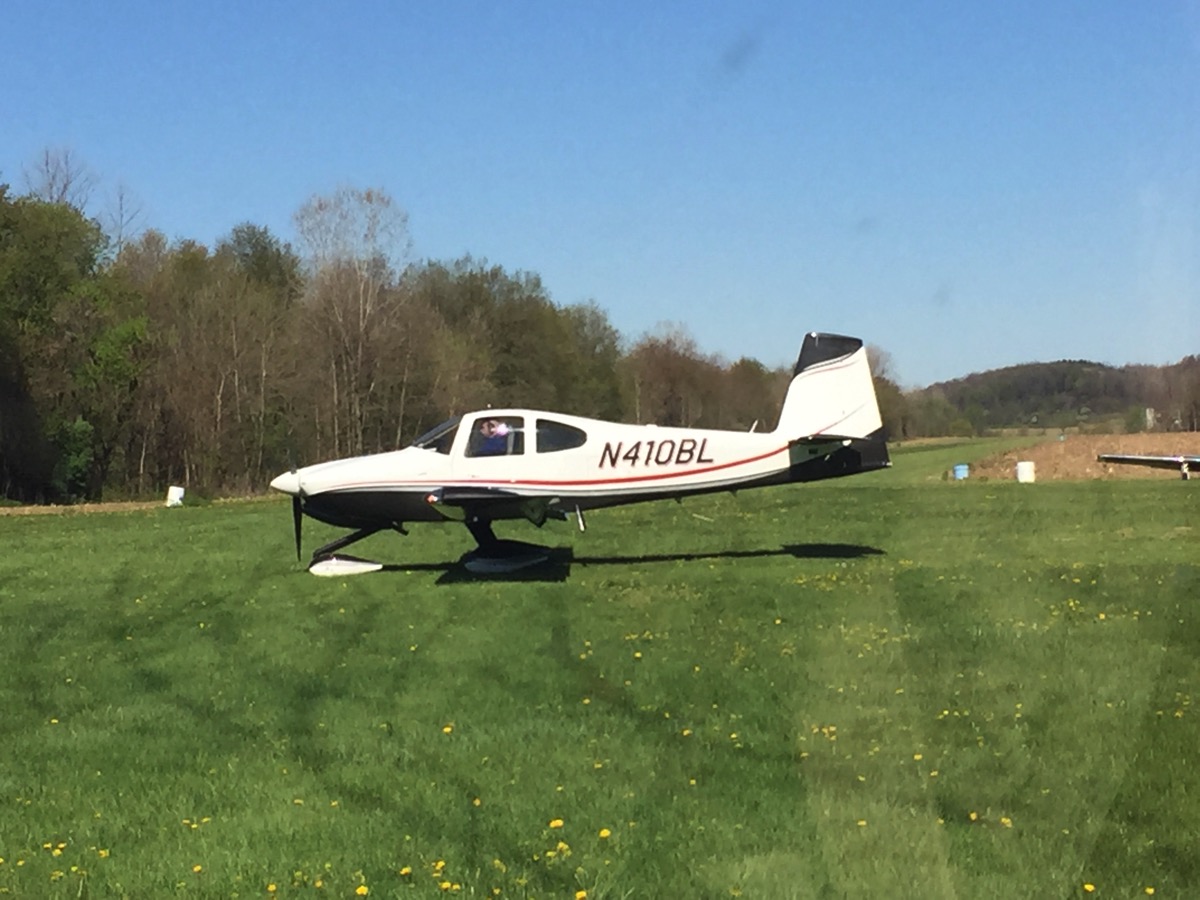
fellow RV8er taxiing for departure

BL is one of my mentors, and was the first EAA Tech Inspector to look at 012 during it’s early stages of assembly.  Here, he’s in the process of taxiing out for departure from Butler in his RV-10.


IMG 5653

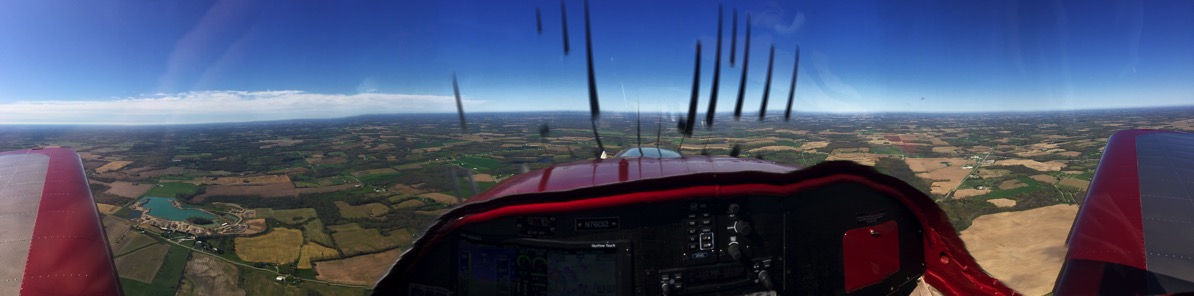
180° panorama of the view on the way back to DLZ


Sunday, April 9, 2017

Phase II

Logbook Entry:

“I certify that the prescribed flight test hours have been completed and the aircraft is controllable throughout its normal range of speeds and throughout all maneuvers to be executed, has no hazardous operating characteristics or design features, and is safe for operation.  The flight tests were completed under the following conditions: typical operating weight, maximum demonstrated airspeed, minimum demonstrated airspeed, and center of gravity range.


IMG 4235

Capt Hill with first passenger and co-pilot. Great flight. Thx


The gentleman on the right, who took and captioned the picture, is my new partner in N7623V, Ed.

Wednesday, March 29, 2017

Painted!

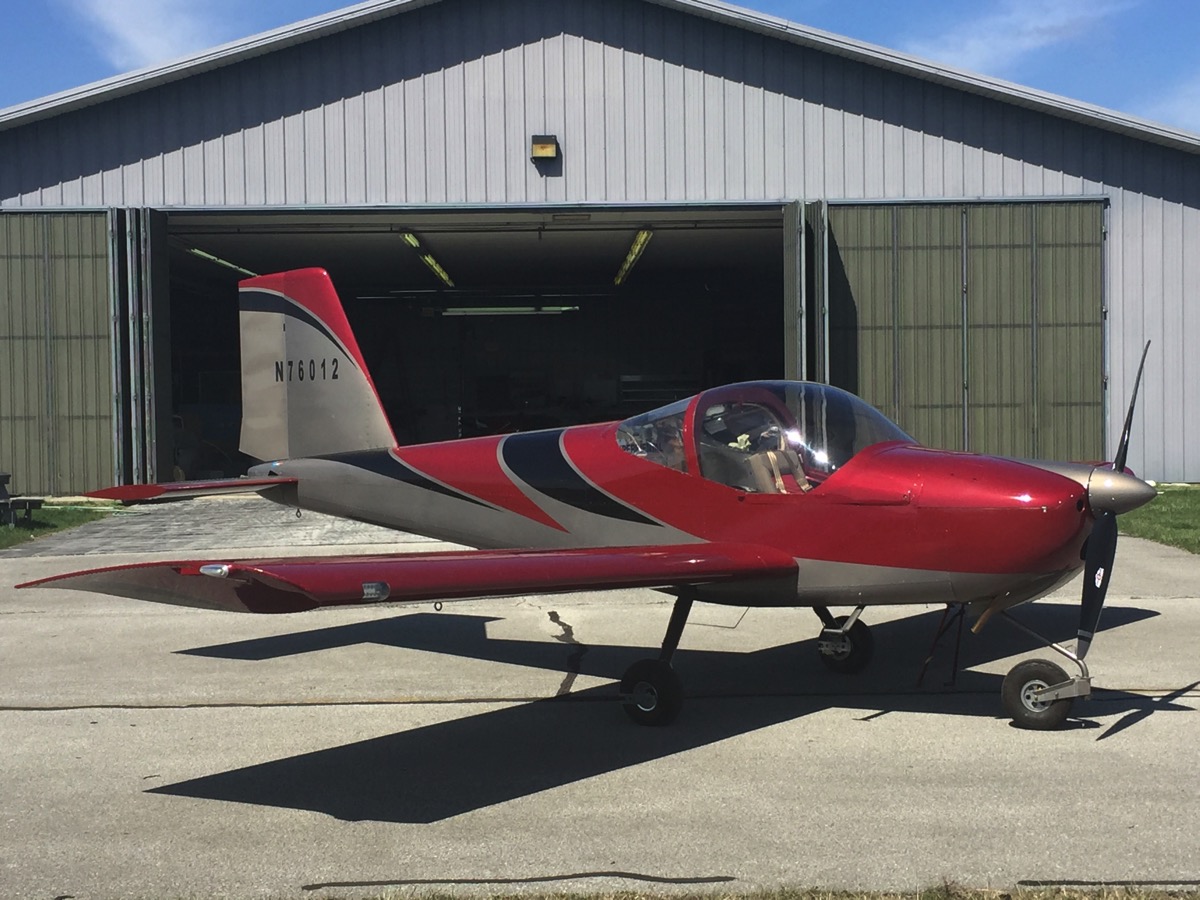
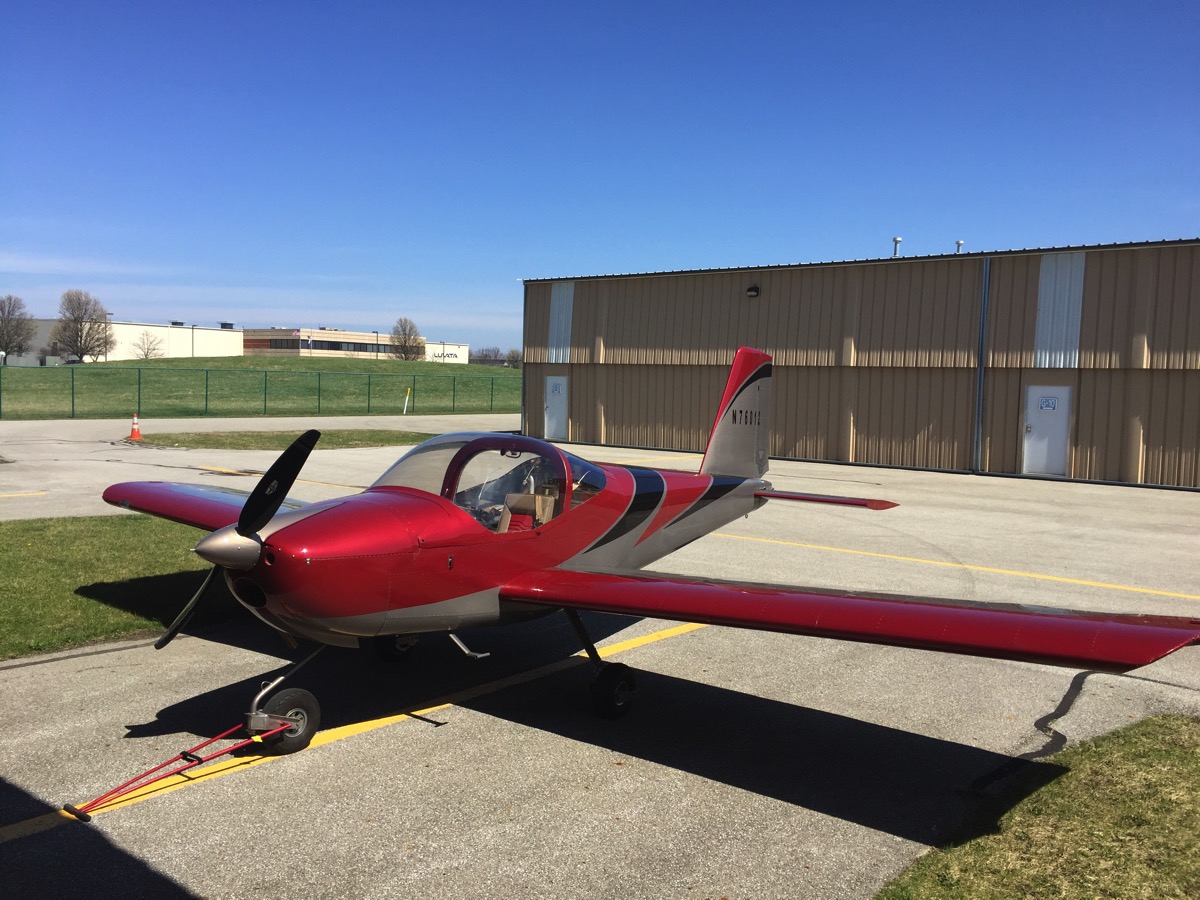
Done!  Chris & I spent about 4 hours putting everything back together.  She’s beautiful!
Logbook entry:
Aircraft painted by Chris Calovini of AV8 Paintworks at KMNN using BASF Limco Single Stage paint system, paint codes RED016, GRY012, BLK002.
IMG 5604
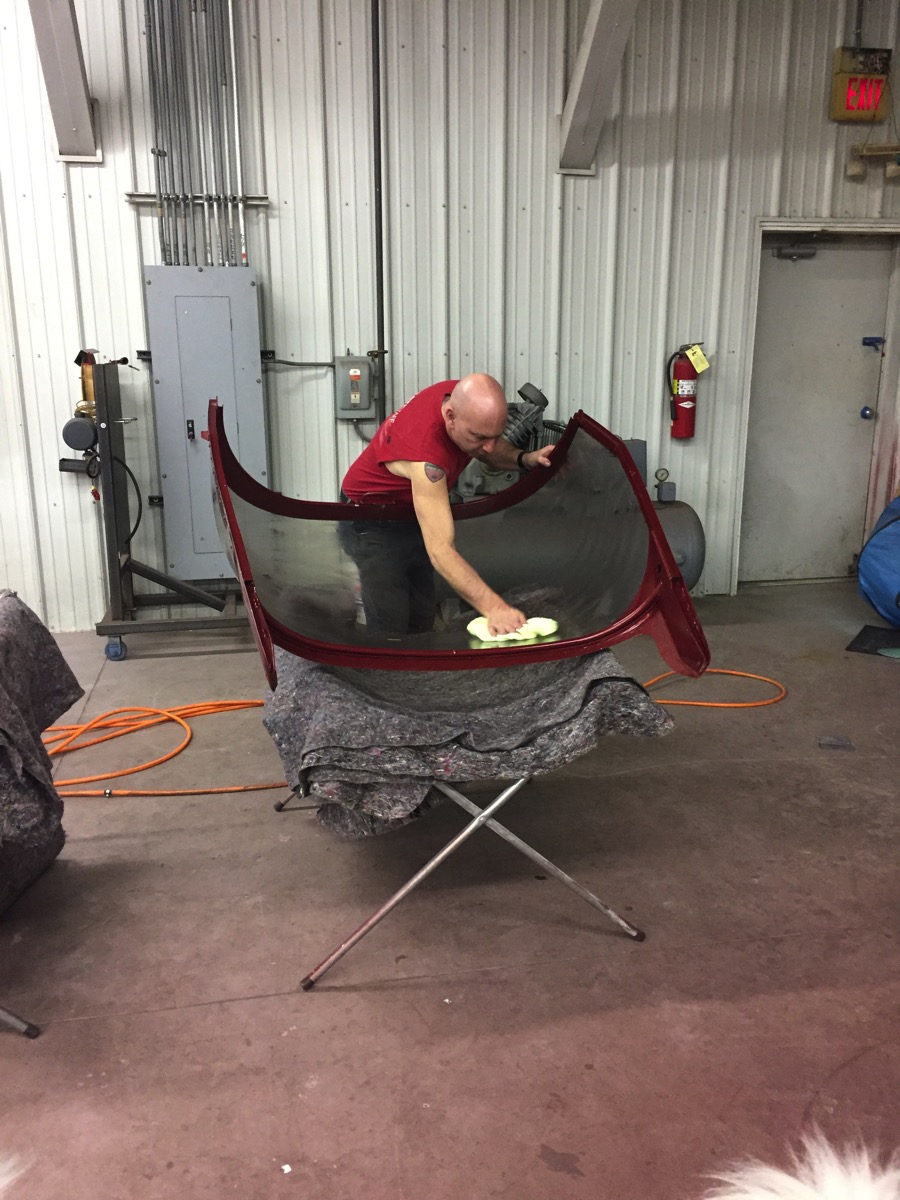
Chris doing final polish of the canopy. 
IMG 5606
All put back together 

IMG 5612Out in the sun 

IMG 5613
At Home

IMG 5614
Back in its own hangar

Saturday, March 25, 2017

Nearly there


I know, you’ve heard that before.   I’ve been saying “real soon now” for a while, but I’m pretty hopeful that I’ll get not only my RV back next week, but also my Cardinal.

The current plan is for me to finish my work weeks from hell (15 shifts in 16 days) on Tuesday around 12:30.  It’s a 90 min drive to DLZ where I’ll stop and look at the Cardinal, pick up my bill and any tools that I think of from the hangar.  Drive up to MNN, hopefully by 3:00. Meet with Chris and admire the paint, which will be 99 % complete.  He & I will put on the wings, canopy, flaperons and rudder.   There’s a very small detail that needs to be painted on the wings, but Chris can’t do that until they are mounted, as he’s matching a curve on the fuselage and measuring and painting won’t be close enough.  I’ll leave the RV with him overnight to work on that little detail.

Next morning, Dale & I meet at 8:00 to go over the Cardinal in detail and do its post-maintenance flight (see below).  Assuming all goes well, he flies me up to MNN and I retrieve N76012, in all of her new livery.


Imagejpeg 0 1

Chris has added the extended black dorsal stripe.  I was concerned about the black that we talked about adding to the vertical surfaces (see previous post), and Chris had the same worries, so that didn’t get added because it would have made the tail look way too heavy.   I may fiddle with a less aggressive treatment, but not for a while!


Imagejpeg 0

The top cowl and spinner have received the grey treatment.  It makes the plane look fast, even on the ground.  You can't see it very well in this picture, but there’s a thin red and black line at the transition from grey to red.    Chris was not happy with the transition from the fiberglass cowling to the aluminum top skin over the panel.  If you look carefully, that top skin is not installed in this picture, so I assume he’s working on it to meet his excellent standards.

I’ve made several references to my Cardinal, so here’s a little back story on what’s going on with her.  I’ve been flying her with a partner, Dale Conklin, for about 10 years.  He decided to sell the plane to me last year, so officially purchased her on 1/1/17.  I decided to use the DLZ A&P, Shane Young, instead of the gentleman who previously owned that shop but continued to maintain 23V after he semi-retired.  As is typical for this situation (new mechanic), there were numerous items that had been felt to be OK by the old A&P but not by the new one.  As a result, 23V has been in the shop for the same 3 months that 012 has been in the paint booth.  As a result, I’ve been completely grounded, despite being the proud owner and financier of two separate planes.  As luck would have it, I think both of them will be airborne on the same day.  Just for completeness’ sake, I’ve included some pictures of 23V in the shop.

IMG 5602

On the jacks for rigging the gear.  The nose gear is infamous for being difficult to rig properly.  In this case, it turned out that there is a critical measurement/step that is not explicitly listed in the manual.  That cost me a day of labor charges.


IMG 0946

This is the nicest thing I’ve seen on her for a long time.  The internal panels are closed and the upholstery back in: signs of being done!

IMG 0945

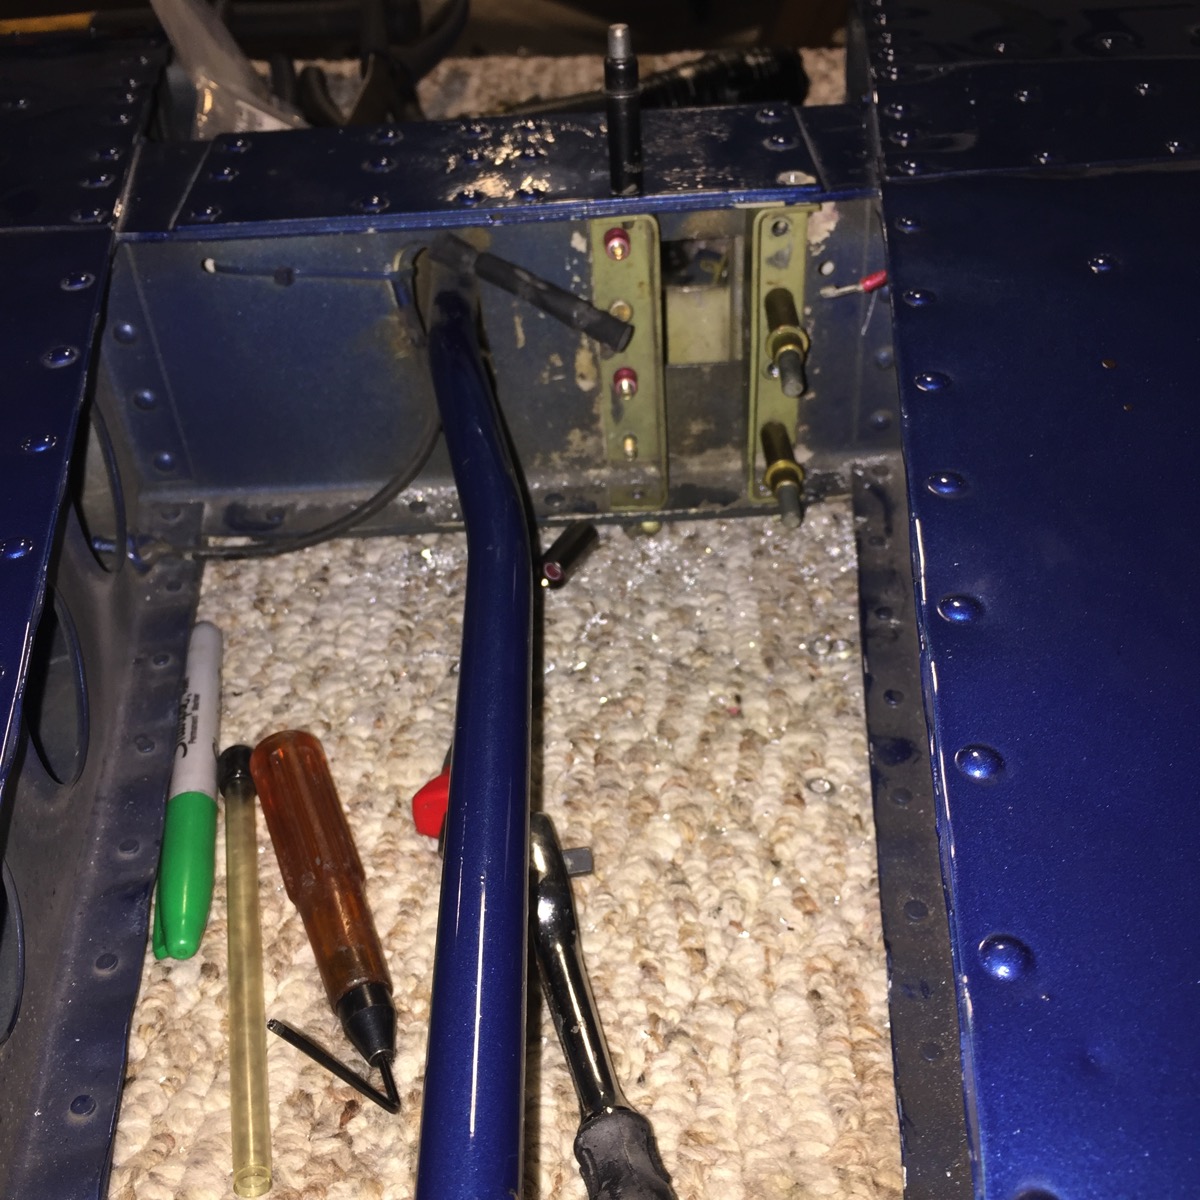
The horizontal stabilator needed to come off and have some serious work done to replace the bolts that hold it on.  Took a long time to drill out the old ones and find the correct replacements called out by the AD. 
IMG 5537

This is a close up of the area that needed all the re-work.  You can see the clecos on one side.

IMG 5315

An older picture from last fall with my son-in-law.

Wednesday, March 15, 2017

in pursuit of perfection

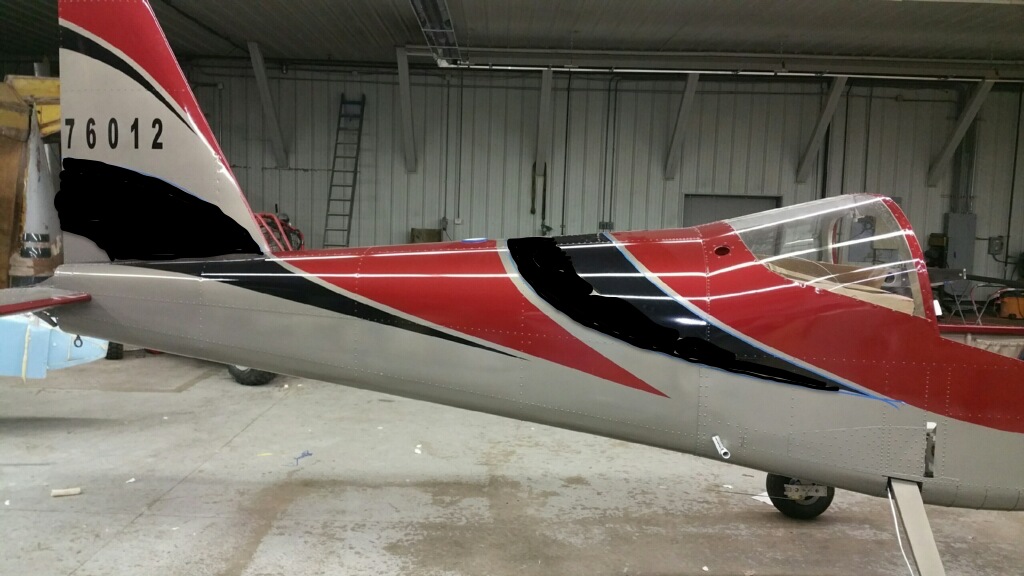
I just got a text & call from Chris at AV8 Paintworks.  Yep, it’s 1:30 AM and he’s working.  He’s just not happy with the design of the black swath on the fuselage.  If you look carefully, you’ll see two blue strips on the vertical stabilizer and on the fuselage.  He wants to extend the fuselage black stripe to the blue line, and add black onto the bottom of the vertical stabilizer.  He really thinks that this will make the lines sweep and flow much more artistically.   I told him to go ahead!


Imagejpeg 0

thin blue lines


Fullsizeoutput 7e2

crude photo manipulation to fill in the black areas

Friday, March 10, 2017

Almost Done With Painting

We’re getting close!   I went up to AV8 Painting on yesterday to check on the progress of the paint job.  Chris had taken my very rough sketch and added a very nice black element that makes the plane look a little longer and much more interesting.  He was a bit worried when I walked in since he had made a moderately substantial change from my original sketch, but that’s exactly what I wanted him to do.  I never claimed that my rough sketch was anything more than that and I wanted him to use his artistic experience to make it work.  I think he did a great job.


IMG 5586

Full body view of completed paint scheme

As you can see, he added a black ‘swoop’ to break up the large dorsal red that I had originally sketched.  He then added another, more angular, ‘swoop’ behind the red that terminates under the vertical stabilizer.   We haven’t mounted the rudder so the end looks a little odd.  The engine cowling is not attached, so ignore the front for now.  I really like the ribbons of beige that separate the red & the black.  I agree with his rationale—that adds a great deal of visual interest, yet doesn’t make it look cluttered.

One option, that I think I will exercise, is to make the upper cowling hump (behind the spinner) the beige.  Again, just a simple addition, but one that will add some interest.  I will probably have him do that when he gets the wheel pants painted.  The flap handle is also on the “touch up” list, but right now we are both interested in getting this thing finished and airborne.

Friday, February 17, 2017

Partial Paint applied


I was planning on working in the hanger on the nose fairing when i got a call from Chris asking if I could come up to AV8 Paintworks and look at the plane and refine the scheme.  As luck would have it, that was the only day in a long time that I was able to do that.  Up to Marion!

Chris expressed some concern about my original sketch.  I was totally OK with that, as I am not an artist and that was merely a quick idea.  If you look at the photo below, you can see a blue line along the fuselage and tail. That was my original sketch.  Chris felt that the upsweep on the tail was counter to the idea of making the plane look like it’s flying.  He got out the yellow tape and we spent about an hour mocking up placements.  The photo below is the final result (rough placement only.). Red will go above the blue/yellow line and encapsulate the cockpit & canopy area.  The next region back will remain beige and sweep from above the wing and over the back. There will be another band of red on the back the reaches to the tail.  The leading edges of all flying surfaces will be red and sweep back.


IMG 5573

Tape for layout of accent colors


The next photo shows he beige and red.  Chris said that they still aren’t ‘finished’ as there is no polishing yet.   I just put the spinner on the horizontal stab so I could see the colors.

IMG 5572

Color!


 The last photo is just to show one of the preparation phases.  The upper cowling is all red, so Chris hasn’t painted it yet.  He did want to put it on the plane for helping visualize the layout, so I just grabbed a photo.  The texture is totally different from the raw fiberglass—I don’t know if it makes sense to say “palpable matte surface”, but that’s what I’m going with. 

IMG 5575

prepped but not painted upper cowl


Friday, February 10, 2017

paint going on

Just received an “in progress” photo from the painter.  he’s got the fuselage painted in the main beige.  You can see a flat grey appearance on the turtle deck. That will become red in the next few days or so.


Imagejpeg 0 1

Glossy Paint!

Sunday, January 15, 2017

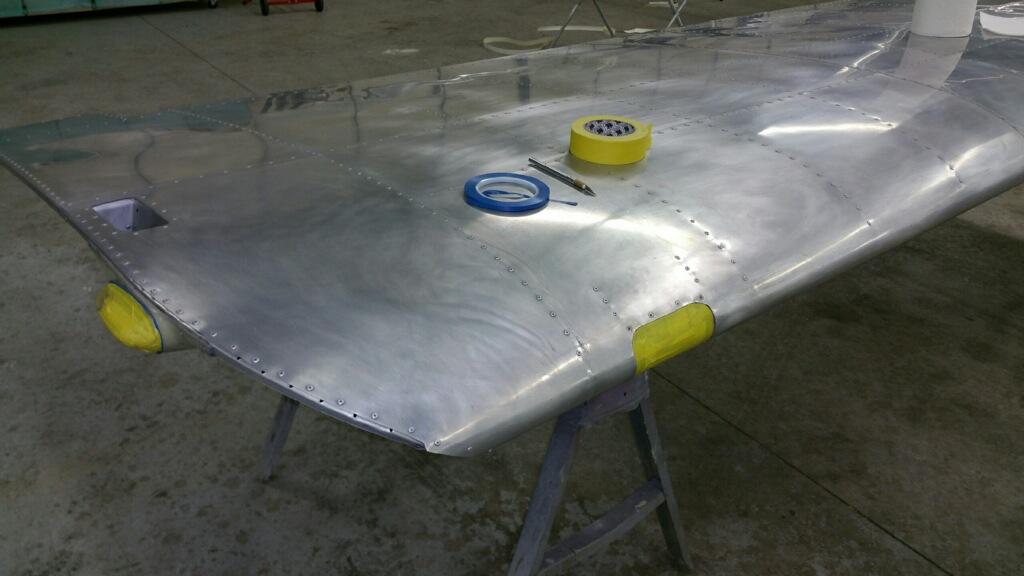
prep & tape

Chris sent me a few photos now that he’s gotten started.  (There were a few weeks around Christmas when he was still getting his new paint shop operational.). 


Imagejpeg 0


Imagejpeg 0 4

HI David. 90% of the aluminum prep is done. You can see the difference between the virgin aluminum and what has been treated. This process provides mechanical adhesion that along with the chemical bond will provide the best possible bond for your paint job. 


Progress will go quickly from here out. Prep is the time consuming part.


He’s planning on shooting on the primer, and then the base coat (beige) and having me come up to look at sketches and do detail decisions on where to place the red (predominately on the leading edges) and black accent paint.

Thursday, January 12, 2017

36-07 Main Wheel Pants

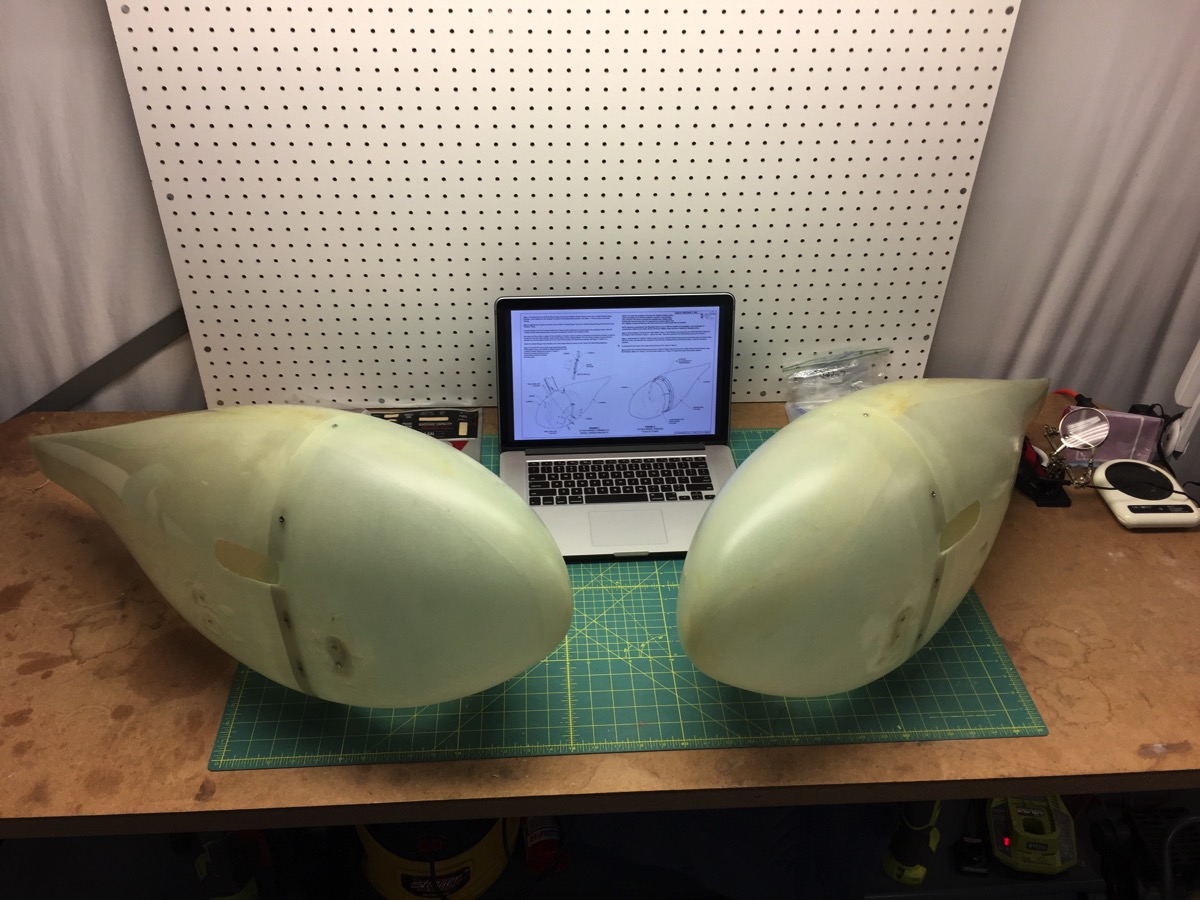
Although it was too late to have them delivered with the rest of the plane, I’m continuing to work on the wheel pants.  I finally finished up the main pants by drilling and installing the 9 nut plates (each) on the rear halves.  When I’m finished with the nose wheel pant, I’ll deliver those up to Chris.  he said he could paint them in a few days.

IMG 5539

Main Wheel Pants

Wednesday, December 28, 2016

delivery for painting!

So, what’s the first thing you do when you get your airplane back together?  In my case, I promptly flew it to AV8 Paintworks in Marion (KMNN) and spent 2 hours taking it apart again.  Cowling, spinner, tail cowling, rudder, flaperons, inspection plates—all off.  I got the control cables disconnected for the horizontal stab and Chris (painter, pictured below) commented that he could paint the tail with the Stab in place, so I didn’t have to remove that. (Good news; I was glad because it’s a royal pain to install.  Bad news: i had already disconnected the cables, and will need to pull the bulkhead to re-tension them when I get it back together.)

IMG 5515

Looks like he’s wiping a tear of joy at having a project to work on!


IMG 5517

She’s all taken apart again, but will look better than ever in a few weeks!

1st Annual Condition Inspection

This is somewhat late (and actually post dated).   I finally finished the annual inspection!  I hired Shane, of Shamrock Aviation, to do the engine inspection as he has the professional expertise and tools.  He had a fairly short squawk list that was easy to take care of.  He said that the engine installation looked good, and that I should have a happy relationship with it.  As is the case with darn near every phase of this project, the rest of the inspection took much longer than I anticipated.  You may have read that I have paralysis by analysis when I have too much on my plate at any one time, and this was no exception.  I finally got things in gear and finished up on 12/28/16, nearly 6 weeks after I started.

The only significant find I came across was evidence of a small leak at the fuel cutoff valve.  I was able to tighten the fittings without any trouble, and I think that they were a bit loose as these were the first flared fittings i had ever done.


IMG 5495

fuel leak at shut off valve.


IMG 5496

all taken apart :(


IMG 5498

on sawhorses for wheel checks


I got things buttoned up the week before Christmas.  It was a bit cold and icy on the ramp.  When I applied power to the warmed engine to try to balance the carbs, I started to slide on the ice.  In my fear driven state, I must have really punched the brakes, as the L brake line suddenly went soft and bottomed out.  By the time I had the power back to idle (almost instantaneous) and the ignitions killed (about  1 or 2 eternities later) and the plane stopped without hitting anything, I instinctively must have pumped the L brake 3 or 4 times before I realized what that meant.  Sure enough, got back in the hangar and there’s a puddle of brake fluid dripping on the floor.  It took 2 days to clean that up.  I tried reproducing my Rube Goldberg nozzle & fill system, then borrowed a vacuum brake bleeder that is meant for car systems before I finally borrowed a pressurized brake bleeder system (meant for airplanes) from Shane.  (I try to avoid relying on him for tools and expertise, but since I’m currently one of his top customers with N7623V, he had no problem lending me the brake filler.) 

IMG 5506

blew a brake line!


IMG 5507

missing rivet!

On 12/28, I mechanically balanced the carbs (foregoing the pneumatic sync for now) and returned to the air.  I flew 3 touch & goes, then headed over to Marion to deliver the plane to AV8 Paintworks for painting!


The following Service Bulletins were verified as completed and/or accomplished during kit assembly:  SA 3-17-11 by inspection on 11/20/2014; SB 04-02-01 NA by shipping date, SB 10-03-17 during kit assembly 4/4/15; SB 10-04-28 NA by shipping date; SB 10-12-14 superseded by SB 16-05-23; SB 11-09-13 by inspection 4/17/16; SB 11-12-14 NA by shipping date; SB 12-01-30 NA by shipping date; SB 12-8-09 NA by shipping date; SB 12-09-26 superseded but SB 12-11-09; SB 12-11-09 NA by shipping date; SB 13-02-06 NA by shipping date; SB 13-03-21 informational only; SB 13-04-05 NA by shipping date; SB 13-08-29 NA by shipping date; SB 13-12-12 NA by shipping date; SB 14-01-17 NA (SLSA only); SB 14-07-23 superseded by SB 14-09-10; SB 14-09-10 superseded by SB 14-12-16; SB 14-10-14 superseded by SB 15-03-15; SB 14-11-03 complied with by installation of doubler 6/4/15; SB 14-12-06 complied with by removal and replacement with improved F-1206 bearing bracket brace 6/11/15; SB 14-12-16 complied with by replacement of throttle return springs 4/4/15; SB 15-03-05 complied with by replacing carb floats 4/4/2015; SB 16-04-10 complied with by testing correct wiring of com radio 12/10/2016;SB 16-05-26 complied with by adding “USA” to data plate 12/10/16;


SB 16-04-23 complied with 12/10/16 by inspection with no cracks around/in WD-1230 nose fork, next due 12/31/17;   SB 16-08-01 complied with 12/10/16 by inspection and no looseness found in stabilator bearings, next due 12/31/17; SB 16-08-24 complied with 12/10/16 by inspection with no evidence of loose rivets on engine mount WD-1204, next due on 12/31/17.


I certify that this aircraft has been inspected on 12/28/2016 in accordance with CFR 14 part 43 appendix D and found to be in condition for safe operation.      TTAF 25 hrs, David B. Hill, RLSA 3132802 


Tuesday, December 13, 2016

carbon fiber panel

the same guy who’s going to paint the plane also does a lot of fiberglass and carbon panel work.  I really didn’t like the flat black spray paint job that I did back 2 years ago (1/5/15).  It was flaking badly and just looked like it would get worse.  As part of the annual inspection, I elected to pull the entire panel and deliver it to him for a cosmetic carbon panel overlay.  Getting the engine controls threaded back through the fire wall and onto the engine were the time consuming part of that project, but it does look much better!


IMG 5500

cosmetic carbon fiber overlay on main panel

Tuesday, November 1, 2016

tempus fugit

my, how time flies when you are having fun flying!  Or, to quote a Virgil via a student of mine, tempus fugit.  

N76012 now has 25 hours on the Hobbs meter.  It has also been a year since my airworthiness certificate was signed, so I have grounded the plane until the 25 hour Rotax inspection and my annual condition inspection are done.  The 25 hr Rotax inspection is pretty much an annual/100 hr inspection according to my local Rotax specialist.  He’s going to help me do that in a few weeks.

I’m pulling the paperwork and organizing the Service Bulletins before I start unscrewing things and just doing random inspection.  In other words, I am making a checklist and to-do list before beginning work.  Stay tuned.

I also identified a new painter at Marion airport, which is only a 10 min flight from Delaware.  He’s just setting up a new business and has agreed to paint the plane sometime in December or January.  I’m learning a fair amount about the painting business in the process. 

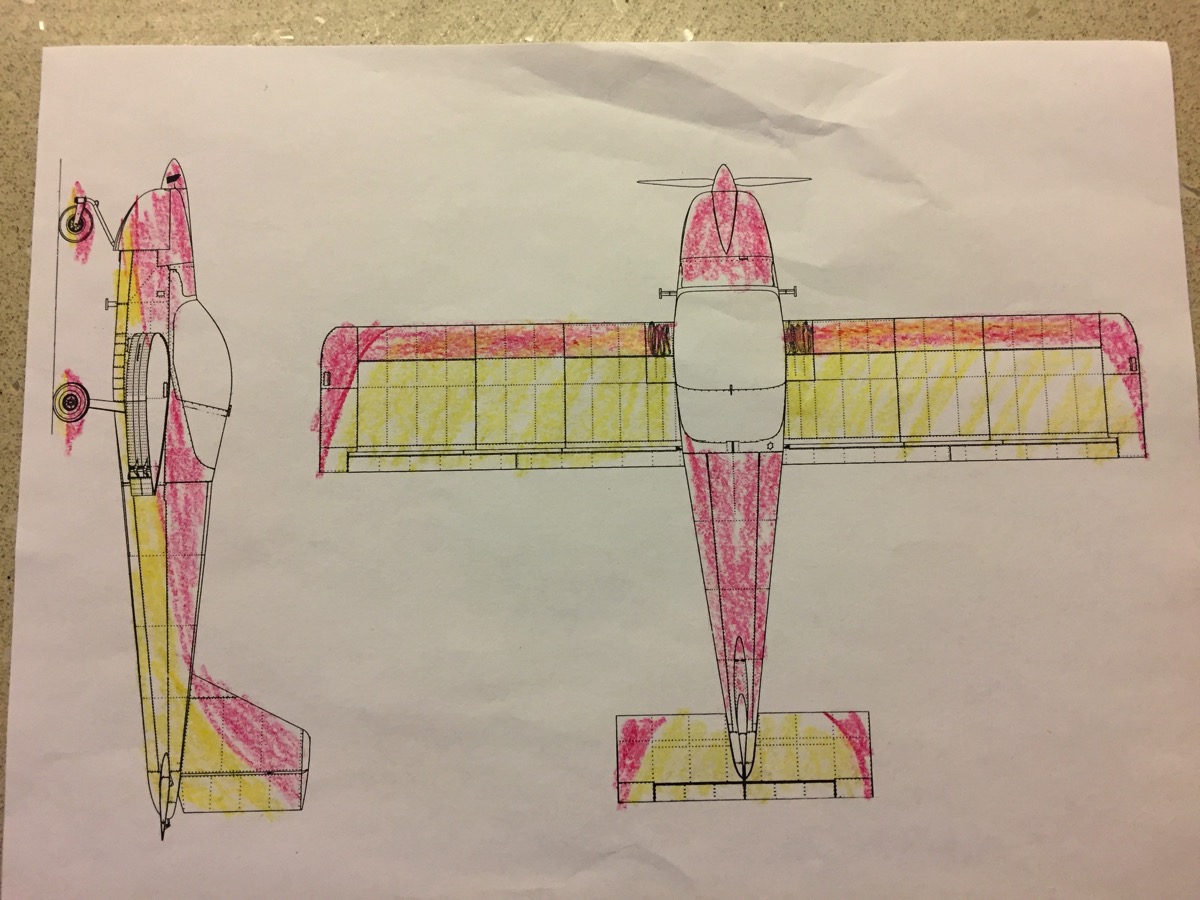
Here’s an embarrassing rendition of a color scheme.  I’ve been carrying around a handful of these 2 view drawings for several months.  Now that I have a painter, I’m finally motivated to choose a paint scheme.  I’ve been collecting pictures of RV-12s and went through my folder.  This scheme (originally in blue/white) kept catching my eye.  I had a few minutes at work the other day and grabbed the crayon set we give to keep kids entertained in the ED and just colored it in.  With only 3 crayons to work with, you’ll have to use your imagination.  The red represents a bright candy apple red, the yellow is actually the beige of the upholstery.  Despite the crudeness of the sketch, I’m pretty pleased with it.

As part of the condition inspection, I will pull the panel and and have it covered in carbon fiber.  Get that done, re-installed and finish the inspection, then fly it over to Marion.  I will take off all the control surfaces and he will paint it. (He says in a week or so!). I then will head back and re-install all of the surfaces, re-tension the control cables, etc. and finally put in all of the carpet.  I will then sign the logbook and take her out of Phase I and into Phase II and find my first passenger!

Fullsizeoutput 7c2

Thursday, September 29, 2016

Catching up, and going UP!

TL;DR

  • she’s flying again
  • AoA installed & working
  • Autopilot working
  • Altitude record of 14,000'


It’s been a good month since I’ve posted, but that’s because I’ve been flying (and working, but that’s another story.)

I did eventually get the canopy back on got back into the air on the 19th and did my 1st Cross Country!  DLZ weather was low fog until about 10:30.  Took off into a glorious CAVU.  About half way there, Fayette Co (I23) AWOS reported "300 broken"!   I diverted to London and set up for a landing.  Checked Fayette AWOS again after a touch&go and heard "300 scattered".  From 1000' at London, it looked totally clear towards Fayette with clouds to the east.  I pressed on and never saw a single cloud near me.  Uneventful landing, grabbed the courtesy car & had my meeting at the hospital.  Only fly in the ointment was that I couldn't establish radio contact with Columbus Departure due to too much noise on my transmissions.  The flight back was pretty uneventful and I played with the autopilot.

The stall indicator was inop on preflight, so I looked at it I after I got back to Delaware.  When I lifted the leading edge tab, I no longer heard/felt the microswitch click and deduced that when I pulled the wing I misaligned the switch when it was put into the sling and missed the cutout for the indicator.  It was pretty easy to pull the access panel and reposition the switch.  While I was there, I saw that I had pulled the AoA sensor line off of the little rivet stem that it connects to.  That went back on easily as well, but i’m debating using another fixture that has a longer stem so the line is not so touchy.  I’m glad I found it when I did, as the next flight was to calibrate the AoA system itself.

I went up to calibrate the AoA line and ended up making an altitude record for the plane.  Calibrating the AoA apparentely used to require multiple stalls.  Now, it involves 4 oscilations from +5° to -5°, and then 1 stall.  Piece of cake!  It seemed to track very well after calibration.  I decided to fly to 10K', but just kept going.  I thought about 14,000, but I needed to get home for dinner!   Unfortunately, I neglected to take any pictures.  My bad.

9/19/2016  Installed AoA (lift reserve) indicator using 25’ 1/8” Tygon tubing, blind rivet from Van’s Static Kit, McMaster 5012K114 quick disconnect, Van’s FLF-00008 1/8” push connect.   Flight test this date to calibrate.  System operational.

9-27-16  I had so much fun climbing the other day, that I wanted to do it again.  I was also a bit disappointed when I realized I had not taken a snapshot of the display, so that was just added incentive.  This time, I went for the legal max ceiling of 14,000'.   Winds were also part of the fun.  I checked the winds aloft and was glad I did--winds were ~50 to 60 kts from the west.  Had I not looked, I could have made my climb downwind and spent a long long time getting home!  It's a bit cool, but the heater did fairly well.  Above 10K, the amount of power produced was down quite a bit, and thus there wasn't that much heat to get out of the heater, but it was enough for me.  A passenger would not be as comfortable, as there is no heater on the right side.  Landing at Delaware was a challenge, but fun and certainly doable.  Winds variable 220-270 @ 11 G 21.

(BTW, for those of you who are curious;  total time above 12,500’ was 18 min.  see 14 CFR §91.211(a)(1).)

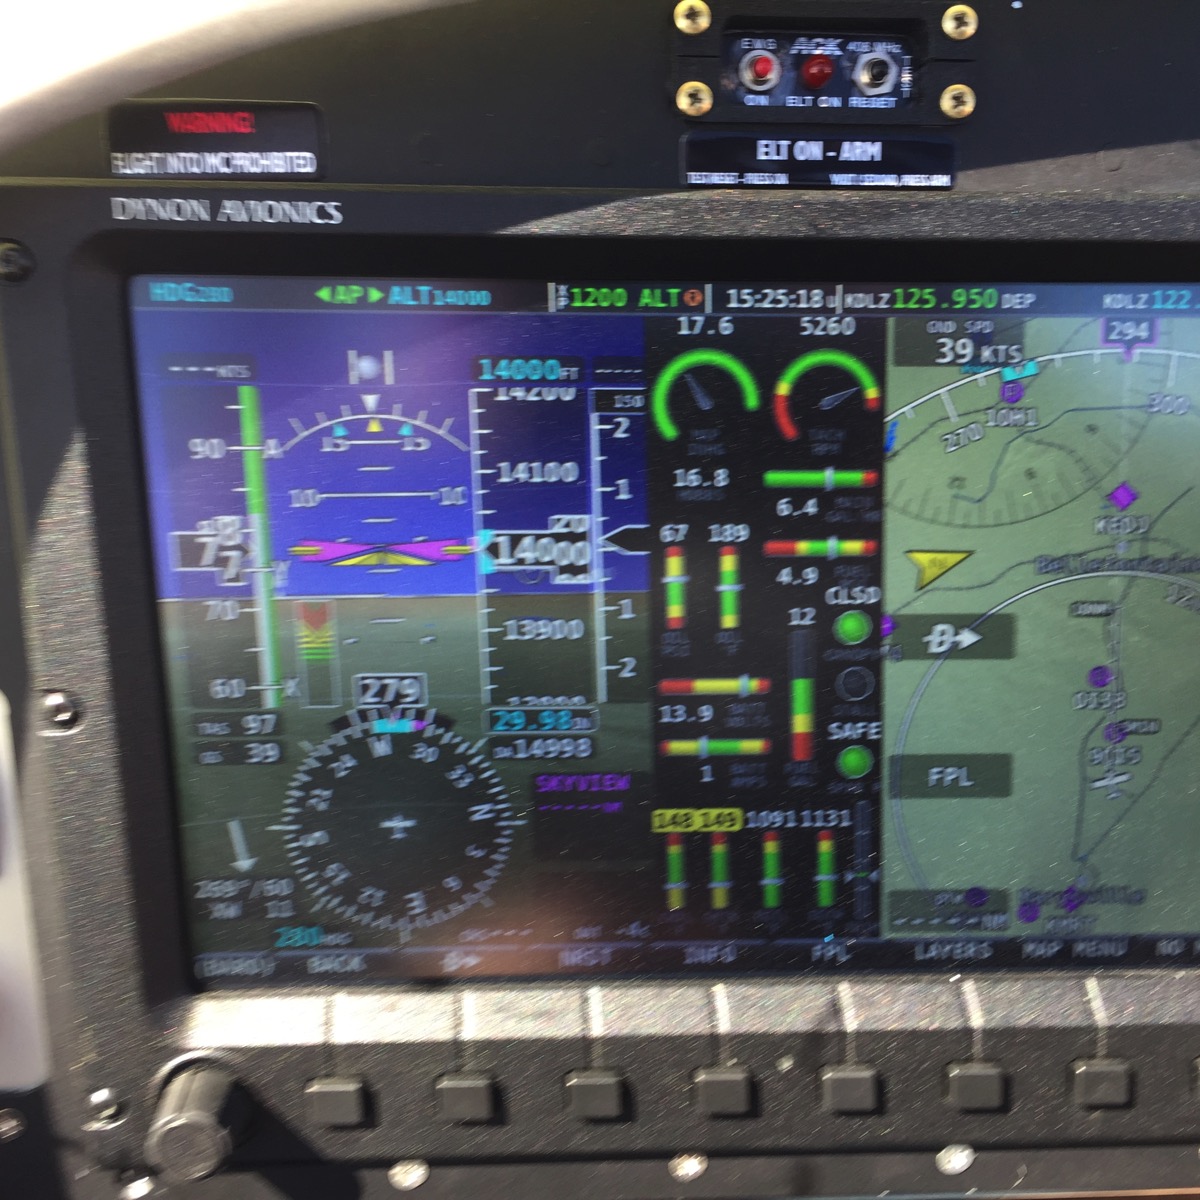
There are two pictures below—1st one is 13,500’ and in focus.  The 2nd is 14,000’, but blurry.  You pick !   😀

Take a look at the wind vector–60 kts!  Amazingly, it was very smooth above 4000’  I had just a touch of turbulence near the top of the climb, and it was a great flight.   Other fun items of notice:  The autopilot worked great on both axes.  I’m still having trouble figuring out how to have it acquire and hold an altitude, and it doesn’t auto-trim yet, but the navigation modes are easy to use.  I did get the vertical mode to hold airspeed and it did so very well.  You can see the AoA display to the right of the bottom of the airspeed tape.  Two green bars were consistently shown during the climb out; I did not see them move much with altitude, although the pitch of the plane did so.  Initially,I was climbing at 10° above the horizon to maintain the 77 KIAS / 2 Green Bars; you can see that I’m at 5° nose up as I reached my ceiling.  Coolant temps were at the bottom of the green (as mentioned above) and EGT’s do drop with altitude.  I think that the auto-leaning carburetors are running a bit rich at altitude.  I’ll talk with Steve Beaver (local hangar neighbor who appears to know everything, plus is a heck of a nice guy) about that.  He’s the only person I’ve come across who understands the Bing carbs.


IMG 5390

almost there!


IMG 5391

14,000’!

Wednesday, August 31, 2016

Step 1: Read directions. Step 2: Follow directions.

OK, this is a just a quick post to remind everybody of the golden rule of building a Van’s aircraft:  If something doesn’t work, then double check everything in the instructions because you’re doing something wrong.

In this case, I assumed since this was  physical drop-in-replacement that all I had to do was drop it in.  Instruction #8, in turn, refers to the elaborate (and I must admit, not the most well written document) which says to load the appropriate configuration file, 12-GPS-2020-PRE-SETS_01-14-16.dfg.  Note that this is not the same as the 12-GPS-250-PRE-SETS_01-14-16.dfg which I have had loaded since last year.  

How did I realize this?  Well, recall that I had determined that the 2020 "wasn’t working", so I took off the canopy and the avionics bay.  I figured out that the old 250 still worked by soldering pins on the cut-off wires and individually putting them in the socket of the Control Module, and it worked perfectly.  I concluded that I had received  a bad 2020.  I ordered a replacement and finally got to the airport.  This time I was smart enough to not undo anything before I had to.  I inserted the plug from the 2nd 2020 and—lo & behold—it didn’t work either. That’s when the light bulb illuminated that I had failed to follow Rule #1 and Rule #2.

Sigh.  Now all I have to do is put the avionics bay cover on and reattach the canopy.


---------------

8/31/16:  Removed SV-GPS-250, replaced with SV-GPS-2020 IAW Van’s Notification 16-01-16.
(s) DBHill 3132802 RLSA-I.

Tuesday, August 23, 2016

dead SV-GPS-2020

I got a chance to go flying the other night.  Technically, the excuse was that I haven’t been night-current for a long time, but you & I know that it’s just because it’s fun to fly.  I had had a fairly stressful set of days at work, and I just needed the stress relief.

The flight was effortless and smooth, taking off about dusk.  I did accomplish 5 night landings. 

and Alas, not everything was roses.  The left strobe refused to light up.  I think I may have done some damage to the electrical connector when I first attempted to replace the wing after installing the AoA hardware.  I recall the AoA connector being wedged between the electrical connector.  That will be where I start debugging, anyway.

When I had installed the new SV-GPS-2020, I received an error message which I mistakenly attributed to no GPS signal inside the hanger.  Nope.  It was the SkyView trying to tell me that there was no GPS receiver.  In other words, the new one wasn’t working.  Yesterday, I was able to have a friend help me get the canopy off and I opened up the avionics bay.  Unfortunately, the new one is wired correctly.  I got my old one and soldered on new pins (I had cut off the old connector as I don’t have an insertion/extraction tool).  Plugging it into the system resulted in a “no position” error for about 3 minutes, then everything worked fine.

I ordered a replacement today from Van’s, along with the extraction tool.  They will give me a credit when I return the defective new unit.  BTW, I’ll do a temporary test installation of the new unit before I run its cables and install it.

Monday, August 15, 2016

Punch List

There’s a term that I’ve heard recently that refers to a list of minor items found on an inspection—punch list.  This posting addresses my punch list from phase 1 testing.   As you may recall, the airport was closed for nearly a month.  I wasn’t able to get out there very often, but took advantage of as much time as I could to address the items I found.  See below for the log entry of tasks that were actually completed. 

I had misdrilled holes in the main wheel fairings.  After a quick consultation on VAF, I filled the holes with floxed epoxy and then put 2 layers of glass inside the fairing.  I’ll get back to them, eventually.

The painters out in Cadiz OH haven’t contacted me yet, but I’m no longer convinced that it’s worth $13K to paint the plane.  I contacted a local painter who has done several RVs on the field and I (and others) like his work.  He only does 2 planes per year, so I’m waiting for next spring.  He’s saying $6-7K, so I think that’s worth while.  I’m using the $6K ‘saved’ to purchase a new avionics box for the Cardinal.

The fuel tank measurement clearly had an electrical problem.  VAF wisdom suggested that it was a faulty ground.  I happened to be lucky enough to have the gremlin poke its head up while I was working on the autopilot (e.g., I noticed the fuel level suddenly at 1 gal.)  I grabbed a test lead and was able to make the level normalize with grounding and could reproduce the up/down swing by removing/replacing the makeshift ground strap.  I will research the best way to attache a more permanent ground screw into a tank full of gasoline (vapor.)


Logbook entry:

Installed angle-of-attack line using 25’ of nylon tubing, McMaster-Carr Quick-Disconnect Tube Coupling 5012K114, Van’s Static Kit.   Removed SV-1000T per factory recommendations. Unit returned to factory for warranty repair.  Reinstalled in aircraft.  Power up test good.   Removed SV-GPS-200, replaced with rule compliant SV-GPS-2020.  Power up check good.  Flight test pending.   Rewired pitch servo and roll servo.  Power up check detects both servos & auto-updates them to current firmware revision.

Wednesday, July 13, 2016

last flight of the summer! (sort of)


Last flight for a month! KDLZ is shut down as of tomorrow for "25 days" of unneeded runway work on behalf of JEGS, so they can land in wet weather. Well, I can't bitch too much, since it won't do any good. I took advantage of a great summer day to just have more fun. I really like shooting landings in this thing! So far, I haven't had a bad landing yet. That's not skill, that's luck.

Did some landings at DLZ, practiced entering a destination into the nav software and headed up to Marion. There, I had the field to myself and did another "cloverleaf" of Rwys 31, 7, 13 and 25 in order. Winds were 220 @ 8, but not really noticible in the plane. I'm actually looking forward to finding a nice crosswind to work with since I had such good luck a while back. Still having problems with the indicated fuel suddenly dropping to 0, 1 or 2 gals with the attendant verbal warnings.

During the summer shutdown, I'll be tacking that issue as well as a few items on my punch list. Of note, the Dynon 1000T gave me an error message that boiled down to "hard drive failing". Dynon had me send it back for warranty replacement. Good timing! The drive is sent out while the airport is closed. I'm on vacation for a week, but when I get back, I'll work on my punch list and hopefully have the main computer back before flights resume.  

IMG 5170

“SYSTEM EVENT 5"