Thursday, January 12, 2017

36-07 Main Wheel Pants

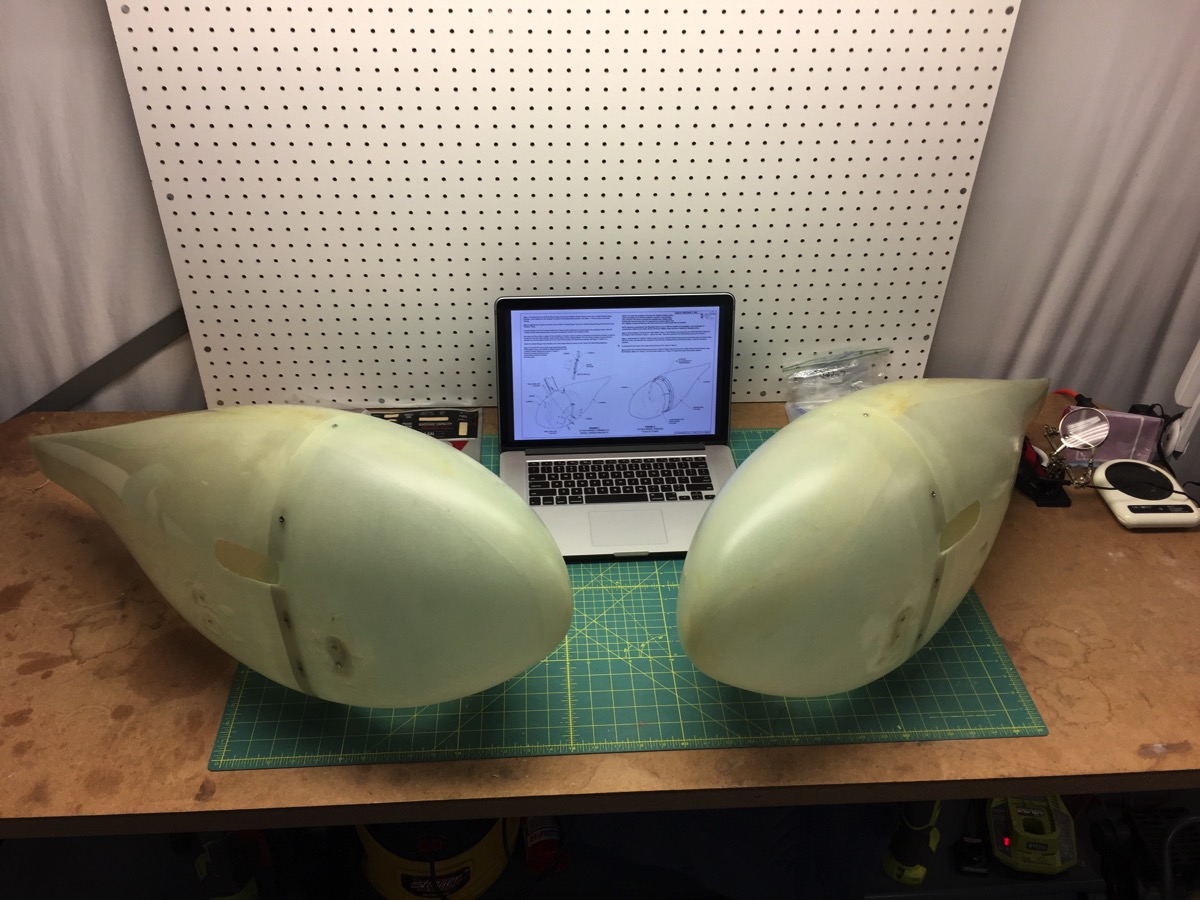
Although it was too late to have them delivered with the rest of the plane, I’m continuing to work on the wheel pants.  I finally finished up the main pants by drilling and installing the 9 nut plates (each) on the rear halves.  When I’m finished with the nose wheel pant, I’ll deliver those up to Chris.  he said he could paint them in a few days.

IMG 5539

Main Wheel Pants

Wednesday, December 28, 2016

delivery for painting!

So, what’s the first thing you do when you get your airplane back together?  In my case, I promptly flew it to AV8 Paintworks in Marion (KMNN) and spent 2 hours taking it apart again.  Cowling, spinner, tail cowling, rudder, flaperons, inspection plates—all off.  I got the control cables disconnected for the horizontal stab and Chris (painter, pictured below) commented that he could paint the tail with the Stab in place, so I didn’t have to remove that. (Good news; I was glad because it’s a royal pain to install.  Bad news: i had already disconnected the cables, and will need to pull the bulkhead to re-tension them when I get it back together.)

IMG 5515

Looks like he’s wiping a tear of joy at having a project to work on!


IMG 5517

She’s all taken apart again, but will look better than ever in a few weeks!

1st Annual Condition Inspection

This is somewhat late (and actually post dated).   I finally finished the annual inspection!  I hired Shane, of Shamrock Aviation, to do the engine inspection as he has the professional expertise and tools.  He had a fairly short squawk list that was easy to take care of.  He said that the engine installation looked good, and that I should have a happy relationship with it.  As is the case with darn near every phase of this project, the rest of the inspection took much longer than I anticipated.  You may have read that I have paralysis by analysis when I have too much on my plate at any one time, and this was no exception.  I finally got things in gear and finished up on 12/28/16, nearly 6 weeks after I started.

The only significant find I came across was evidence of a small leak at the fuel cutoff valve.  I was able to tighten the fittings without any trouble, and I think that they were a bit loose as these were the first flared fittings i had ever done.


IMG 5495

fuel leak at shut off valve.


IMG 5496

all taken apart :(


IMG 5498

on sawhorses for wheel checks


I got things buttoned up the week before Christmas.  It was a bit cold and icy on the ramp.  When I applied power to the warmed engine to try to balance the carbs, I started to slide on the ice.  In my fear driven state, I must have really punched the brakes, as the L brake line suddenly went soft and bottomed out.  By the time I had the power back to idle (almost instantaneous) and the ignitions killed (about  1 or 2 eternities later) and the plane stopped without hitting anything, I instinctively must have pumped the L brake 3 or 4 times before I realized what that meant.  Sure enough, got back in the hangar and there’s a puddle of brake fluid dripping on the floor.  It took 2 days to clean that up.  I tried reproducing my Rube Goldberg nozzle & fill system, then borrowed a vacuum brake bleeder that is meant for car systems before I finally borrowed a pressurized brake bleeder system (meant for airplanes) from Shane.  (I try to avoid relying on him for tools and expertise, but since I’m currently one of his top customers with N7623V, he had no problem lending me the brake filler.) 

IMG 5506

blew a brake line!


IMG 5507

missing rivet!

On 12/28, I mechanically balanced the carbs (foregoing the pneumatic sync for now) and returned to the air.  I flew 3 touch & goes, then headed over to Marion to deliver the plane to AV8 Paintworks for painting!


The following Service Bulletins were verified as completed and/or accomplished during kit assembly:  SA 3-17-11 by inspection on 11/20/2014; SB 04-02-01 NA by shipping date, SB 10-03-17 during kit assembly 4/4/15; SB 10-04-28 NA by shipping date; SB 10-12-14 superseded by SB 16-05-23; SB 11-09-13 by inspection 4/17/16; SB 11-12-14 NA by shipping date; SB 12-01-30 NA by shipping date; SB 12-8-09 NA by shipping date; SB 12-09-26 superseded but SB 12-11-09; SB 12-11-09 NA by shipping date; SB 13-02-06 NA by shipping date; SB 13-03-21 informational only; SB 13-04-05 NA by shipping date; SB 13-08-29 NA by shipping date; SB 13-12-12 NA by shipping date; SB 14-01-17 NA (SLSA only); SB 14-07-23 superseded by SB 14-09-10; SB 14-09-10 superseded by SB 14-12-16; SB 14-10-14 superseded by SB 15-03-15; SB 14-11-03 complied with by installation of doubler 6/4/15; SB 14-12-06 complied with by removal and replacement with improved F-1206 bearing bracket brace 6/11/15; SB 14-12-16 complied with by replacement of throttle return springs 4/4/15; SB 15-03-05 complied with by replacing carb floats 4/4/2015; SB 16-04-10 complied with by testing correct wiring of com radio 12/10/2016;SB 16-05-26 complied with by adding “USA” to data plate 12/10/16;


SB 16-04-23 complied with 12/10/16 by inspection with no cracks around/in WD-1230 nose fork, next due 12/31/17;   SB 16-08-01 complied with 12/10/16 by inspection and no looseness found in stabilator bearings, next due 12/31/17; SB 16-08-24 complied with 12/10/16 by inspection with no evidence of loose rivets on engine mount WD-1204, next due on 12/31/17.


I certify that this aircraft has been inspected on 12/28/2016 in accordance with CFR 14 part 43 appendix D and found to be in condition for safe operation.      TTAF 25 hrs, David B. Hill, RLSA 3132802 


Tuesday, December 13, 2016

carbon fiber panel

the same guy who’s going to paint the plane also does a lot of fiberglass and carbon panel work.  I really didn’t like the flat black spray paint job that I did back 2 years ago (1/5/15).  It was flaking badly and just looked like it would get worse.  As part of the annual inspection, I elected to pull the entire panel and deliver it to him for a cosmetic carbon panel overlay.  Getting the engine controls threaded back through the fire wall and onto the engine were the time consuming part of that project, but it does look much better!


IMG 5500

cosmetic carbon fiber overlay on main panel

Friday, December 2, 2016

36-06 Main Wheel Fairings fitted

But that’s not all.   Two weeks ago I took out the entire instrument panel and delivered it to AV8 Paintworks at Marion to have it covered in black carbon fiber.  This is due to the fact that i originally painted it with flat black out of a spray can.  The paint is flaking badly, so I wanted to do something about it.  Since the plane is down for annual (a subject I’ll get back to eventually) I thought it was a good idea to get it done while doing the annual.

November was a crappy month to do anything on the plane.  I had to travel for business and still keep up my full schedule.  Other than getting the panel out and up to Marion, I really didn’t get much done.  Because I’m (tentatively) scheduled to get the plane painted this month (December) I’m pretty agitated about needed to finish the annual and finish the wheel fairings so they can all be painted at the same time.  Unfortunately, when I have multiple conflicting goals—and I don’t feel comfortable with either of them—I have a tendency to fall into the “paralysis by analysis” mode.  That was pretty much all of November.

The day before yesterday, I got to the hangar and made a deliberate decision to get something done.  I chose the wheel fairings.  About 5 hours of cutting and tweaking, I think that I'm over the most difficult part (putting epoxy&flox inside, where I can’t get to it.)

Remember how much I sweated getting those holes lined up?  I even went to the trouble of back-light drilling.  For reasons I can’t explain, but am no longer surprised by, those holes don’t line up when I actually put the fairings on the wheels.  I spent an entertaining hour trying to figure out how to get a light source inside the fairing that had a complete wheel in there.  I ended up taping my phone (with the light turned on) to the tire and attaching the fairing and drilling again.  Since the next step is to use flox/epoxy to build up the inside, I realized that the mixture will fill the slightly offset hole that was laboriously created a few weeks ago.

Anyway, I’m going to finish up the wheel fairings, then continue the annual inspection.  It’s not logical, but it works for me.


IMG 5489

Left Main Wheel Fairing Aft


IMG 5491

Right Main Wheel Fairing

Tuesday, November 8, 2016

36-03 & 36-04 main wheel fairings prep

it’s been so long since I just did a routine ‘page report’ that I almost forgot how.  Anyway, the plane is effectively grounded since I’m at 25 hrs on the Hobbs, so—despite being a beautiful day—I decided to get to work on finishing the plane by doing the wheel pants.  I also have a bit of a deadline as I need them done before we go to get it painted next week.

The current plan is to get the engine inspected on Friday morning and take the instrument panels to the painter in the afternoon.  He will take off the spray paint (that’s already flaking) and do a nice carbon fiber overlay.  I’m out of town next week, so that works well.  While the panels are being done, I’ll start on the annual condition inspection.  That should be signed off in early December.  I have 1 or 2 flights to do to finish the Product Acceptance Procedure which I will do and then deliver the plane to Marion for paint.  After getting it painted and re-assembled, it will be very appropriate to sign it off from phase I!

Anyway, back to the present.

Back in the summer, I had finished sanding the front shells to mate well with the rear shells.  It took much longer than expected, and was surprisingly difficult.  One of my hangar neighbors has a new-to-him RV7 (?) which is gorgeous.  I decided that i may be getting a tad anal about trying to match sand the shells, so I went over and looked at his wheel pants.  They have a bit more gap than I do, and his plane is perfect, so I stopped sanding.

Once again, I read the instructions until I understood them (cue the minor key violins) and proceeded with confidence.  I drilled out the little dimples where the screws will attach the wheel fairing brackets.  Damn.  The dimples only are useful if you happen to have sanded the shells exactly as designed.  See paragraph above.   It took a while to figure out what to do.  I didn’t want to just drill again too close to the holes, so I ended up mixing up some flox and filling in the holes, then overlying that with some fiberglass.  That was about 2 months ago.

Today I finished fitting the shells together with tape and drilling the 9 #40 holes around the ‘equator’ and clecoed in place (from the inside.)  I screwed the wheel fairing attach brackets into the rears, then used a light to shine through the front holes and match drilled them.  Viola! 


IMG 5459

Match drilled Main Wheel Fairing

 With the bright light shining through, you can see the fiberglass repair showing through.  It’s quite invisible without the internal light, much less with paint.

The next page was to mark and cut out the locations that the gear legs will pass through. I laid down masking tape and double checked all measurements before making short work of it with the dremel cutting disc and small sanding drum.  Alas, I ran out of time and didn’t get to proceed to the next page.  Next time!

IMG 5462

Main Wheel Fairing with leg cut outs

Tuesday, November 1, 2016

tempus fugit

my, how time flies when you are having fun flying!  Or, to quote a Virgil via a student of mine, tempus fugit.  

N76012 now has 25 hours on the Hobbs meter.  It has also been a year since my airworthiness certificate was signed, so I have grounded the plane until the 25 hour Rotax inspection and my annual condition inspection are done.  The 25 hr Rotax inspection is pretty much an annual/100 hr inspection according to my local Rotax specialist.  He’s going to help me do that in a few weeks.

I’m pulling the paperwork and organizing the Service Bulletins before I start unscrewing things and just doing random inspection.  In other words, I am making a checklist and to-do list before beginning work.  Stay tuned.

I also identified a new painter at Marion airport, which is only a 10 min flight from Delaware.  He’s just setting up a new business and has agreed to paint the plane sometime in December or January.  I’m learning a fair amount about the painting business in the process. 

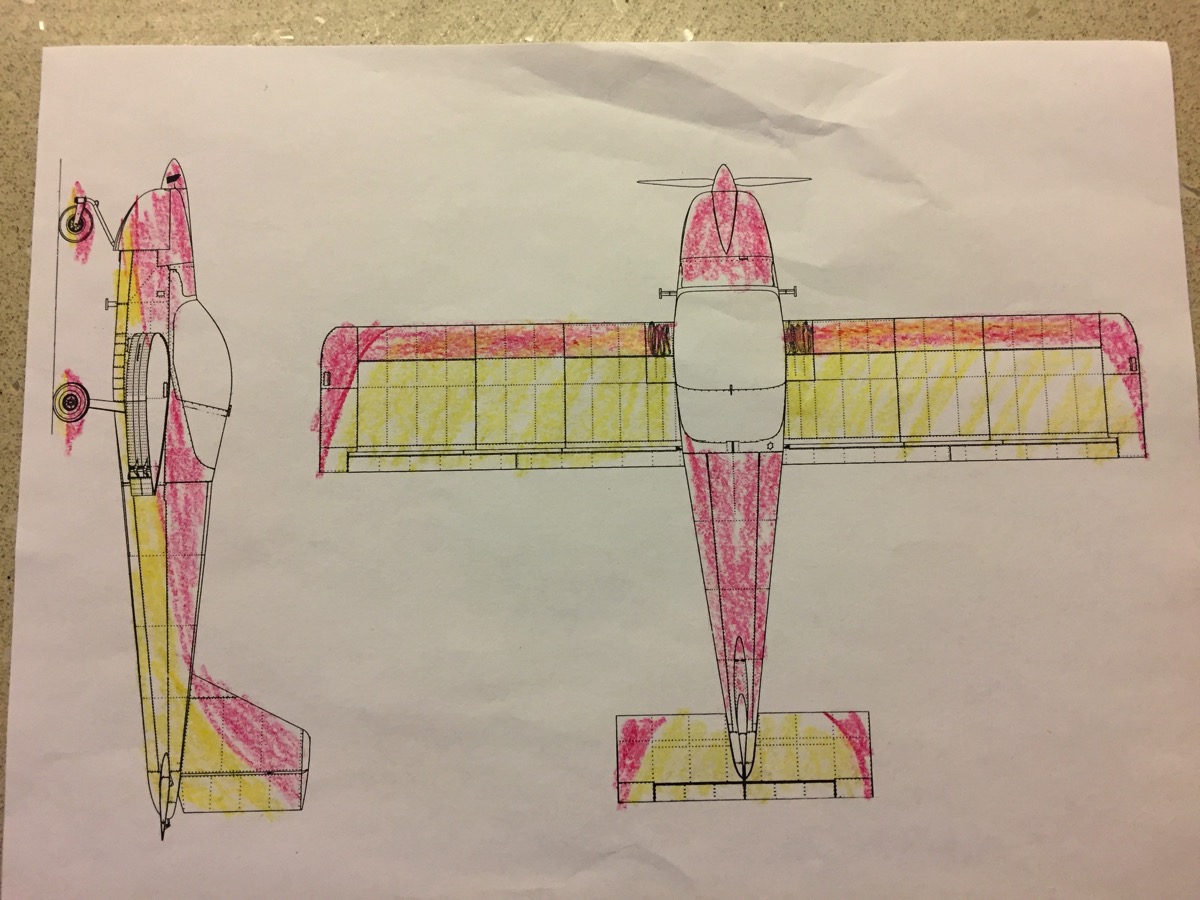
Here’s an embarrassing rendition of a color scheme.  I’ve been carrying around a handful of these 2 view drawings for several months.  Now that I have a painter, I’m finally motivated to choose a paint scheme.  I’ve been collecting pictures of RV-12s and went through my folder.  This scheme (originally in blue/white) kept catching my eye.  I had a few minutes at work the other day and grabbed the crayon set we give to keep kids entertained in the ED and just colored it in.  With only 3 crayons to work with, you’ll have to use your imagination.  The red represents a bright candy apple red, the yellow is actually the beige of the upholstery.  Despite the crudeness of the sketch, I’m pretty pleased with it.

As part of the condition inspection, I will pull the panel and and have it covered in carbon fiber.  Get that done, re-installed and finish the inspection, then fly it over to Marion.  I will take off all the control surfaces and he will paint it. (He says in a week or so!). I then will head back and re-install all of the surfaces, re-tension the control cables, etc. and finally put in all of the carpet.  I will then sign the logbook and take her out of Phase I and into Phase II and find my first passenger!

Fullsizeoutput 7c2